
Both helmet decals and transfer printing are methods used to apply graphics and designs to helmets, but they differ significantly in their application process, durability, and the types of finishes they can achieve.
Helmet Decals (Stickers)
What they are: Decals are pre-printed designs on a thin, adhesive-backed material (often vinyl) that are cut to shape and then manually applied to the helmet’s surface. They are essentially high-quality stickers.
How they’re applied:
- The helmet surface is cleaned.
- The backing paper is peeled off the decal.
- The decal is carefully positioned and pressed onto the helmet.
- Air bubbles are smoothed out.
Pros:
- Cost-Effective: Generally cheaper for individual or small batch applications.
- Easy DIY Application: Can be applied by individuals with relative ease.
- Removable: Can often be removed without damaging the helmet’s original paint, though residue might be left.
- Customizable: Easy to create individual, one-off designs.
- Layering: Different decals can be layered for complex designs.
Cons:
- Durability: Can peel, chip, or fade over time, especially with exposure to weather or impacts.
- Seams/Edges: Visible edges where the decal meets the helmet surface, which can collect dirt or start to lift.
- Limited Conformity: May not conform perfectly to complex curves and irregular surfaces, leading to wrinkles or bubbles.
- Less Professional Finish: The “sticker” look can be apparent.
- Protection: Offers no additional protection to the helmet’s surface.
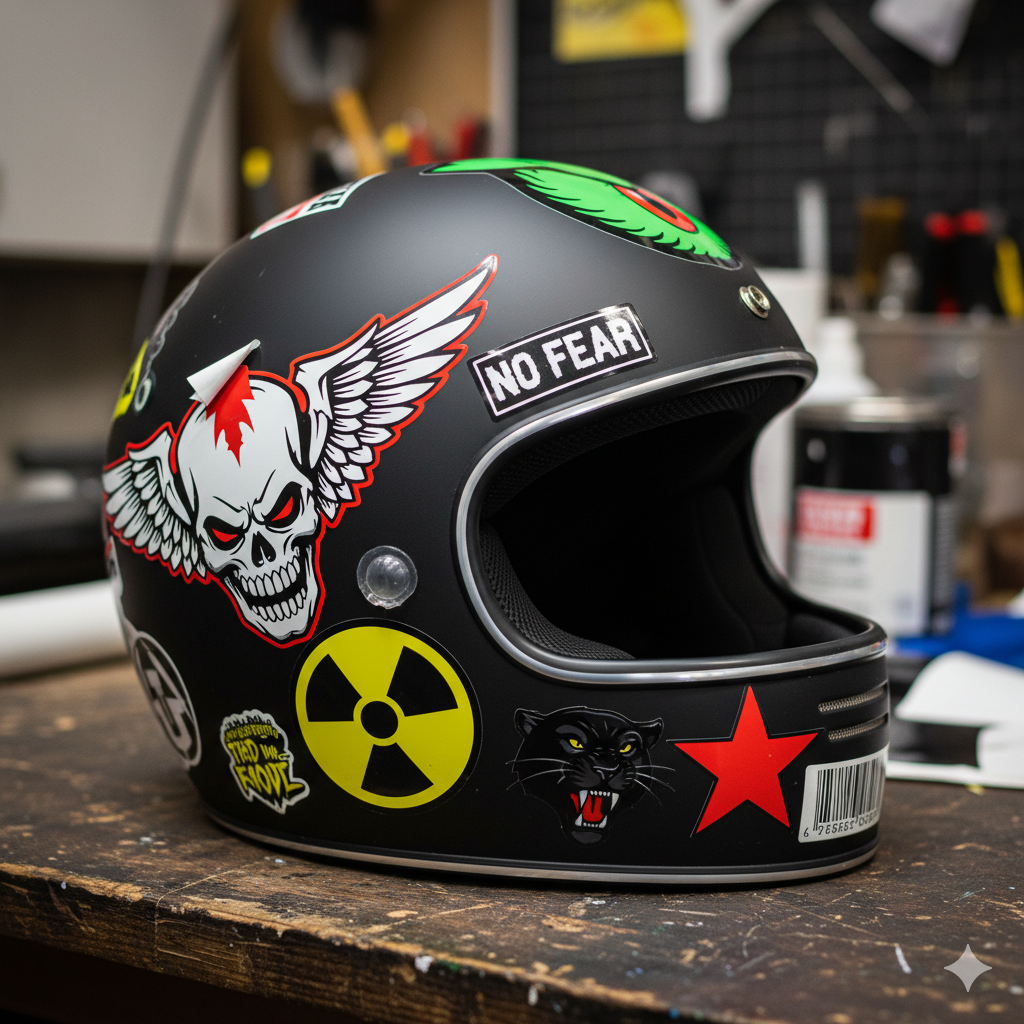
Here’s an example of a helmet with decals:
Transfer Printing (Hydrographics / Water Transfer Printing)
What it is: Transfer printing is a method of applying printed designs to three-dimensional objects, like helmets, by floating an ink pattern on the surface of water. The object is then dipped into the water, and the surface tension of the water causes the pattern to wrap around and adhere to the object.
How it’s applied:
- Preparation: The helmet is thoroughly cleaned, sanded, and a base coat of paint (often a specific color to enhance the pattern) is applied.
- Film Setup: A PVA (polyvinyl alcohol) film, with the desired graphic printed on it, is carefully laid on the surface of a tank of water.
- Activation: A chemical activator is sprayed over the film, dissolving the PVA and leaving the ink pattern floating on the water’s surface.
- Dipping: The helmet is slowly and carefully dipped into the water, allowing the ink pattern to wrap around its contours.
- Rinsing: The helmet is rinsed to remove any residue.
- Clear Coat: A durable clear coat (matte or gloss) is applied and cured to protect the design and give it a professional finish.
Pros:
- Seamless Finish: The design wraps seamlessly around complex curves and irregular shapes, looking like it’s part of the helmet’s original finish.
- Durability: When properly clear-coated, the finish is highly durable, resistant to scratches, fading, and weathering.
- Professional Look: Creates a high-quality, factory-like appearance.
- Wide Range of Patterns: Allows for intricate and realistic patterns like carbon fiber, wood grain, camouflage, and custom artistic designs.
- Full Coverage: Can cover the entire helmet surface with a consistent pattern.
Cons:
- Cost: Generally more expensive than decals, especially for one-off applications, due to specialized equipment and labor.
- Complexity: Requires specialized equipment (dipping tank, activator, specific films) and expertise. Not a simple DIY process.
- Permanent: Once applied and clear-coated, the design is permanent and difficult to change without completely refinishing the helmet.
- Base Coat Importance: The base coat color significantly affects the final look of the pattern.
- No Layering: Difficult to layer different hydrographic patterns in a precise way.
Post time: Sep-13-2025


